|
| Lovely floral pattern, delicate and broadly tessellated. |
So I began by draping the pattern for the bodice... or more precisely, the lining of the bodice. As usual, I had to test out how I wanted the seaming on the back. My plan was to do deep en-fourreau pleating inside the back piece, and also on the front panels of the open robe, so I would have to know where to pleat and then cut.
 |
| Pinning the fabric to the dress form to start. |
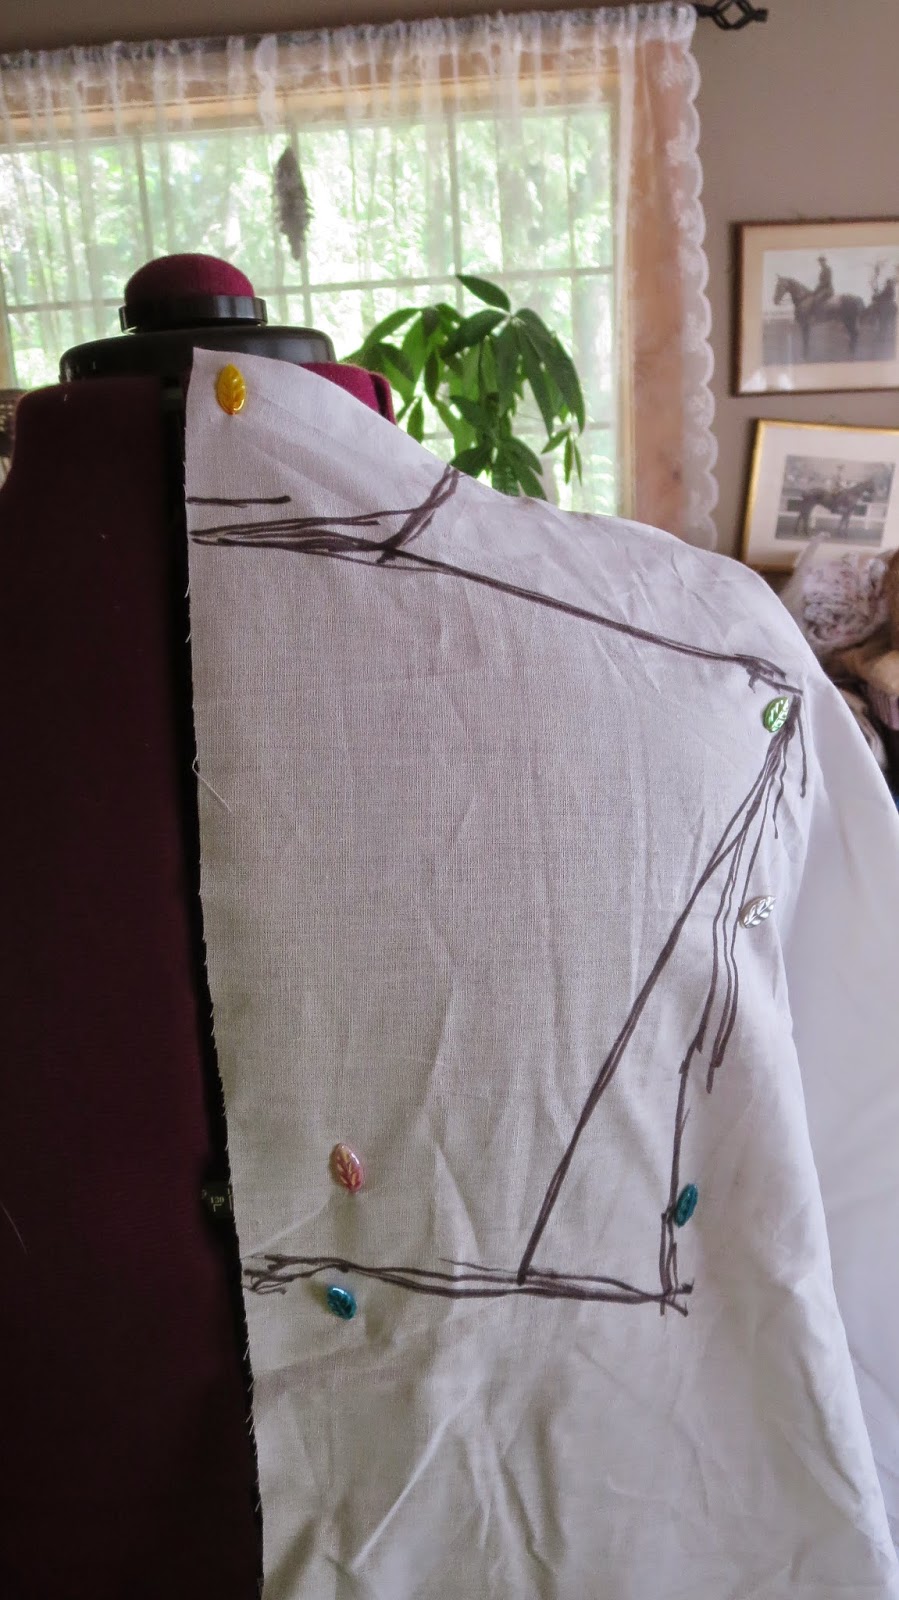 |
| Figuring out where my en- fourreau back will lie. A few sketched lines. |
 |
| Laying the fabric over the front, I now match the shoulder to the back piece which has been cut out and pinned to my form. |
I never learned formally how to drape. I just started draping. I didn't even know the word 'draping' applied to making patterns on dress forms. And I had no idea I was making slopers. In fact, I had no idea the word sloper existed when I started this stuff. The first time, I draped a gown (my infamous green one), I did it with plastic bags and tape.
 |
| Checking my drawing against the cut piece on the back to make sure they line up. |
 |
| Drawing the armscye |
 |
| Pinning, drawing and aligning, with an X to cut out the armscye |
 |
| Classic example of Stephanie style winging-it. The breast on the dress form is in the wrong place for Regency. I just eyeballed where the front of the bodice would end. It wasn't correct ultimately. But it is lining, so no tragedy. |

 |
| More lines and experimenting. |
 |
| The front panel ended up being too short. Not a tragedy, since the front was draped and stitched into shape over the lining anyway. |

Once the lining was cut from fabric sans sharpie marks, I pinned the back in place, leaving the two side-fronts off, and then started pinning the fabric onto the back with the pleating as I wanted it. Now unfortunately, the memory card I took the series of photos with for this process decided to go corrupt on me. I'm not sure why. It's kind of pissing me off, since it was the few times I actually bothered to take pictures. But it really wasn't easy. The pinning of the pleats where I wanted them, that's the easy part. Marrying the back to the sides, that's where the challenge is. I took extensive photos of the process, the trimming of the back as everything was stitched down, the capping off of the pleats that extended out, and the draping and alignment of the sides and front. The setting of the armscyes, and the addition of a couple of pleats under the arms to allow for some looseness on the sides. It really wasn't ALL that different from the ruched gown, really except the wider pleats into the back, which left pleats that needed to be extended out underneath the sides, capped off and trimmed. You can view that linked post for some drawings on how I did the work on that gown.
Mind you, I hand-stitched the whole thing, so it took a great deal of time, mostly done in the hours after Alex was in bed, and sometimes as late as three in the morning. But I got it done. Here it is without the sleeves on it:
 |
| My first gown with a major train, Besides the one I made from my wedding dress. |
 |
| more detail on the back |
 |
| The pleats on the front panels. |
 |
| A sweet little gown with nursing panels and some sweet pin tucks. |
 |
| The tar stain is mostly gone, surprisingly. Who knew that goo-gone would be the trick. I scrubbed it with the goo gone, and then tossed it into the wash. The stain is on the back of he skirts. |
 |
| A simple drawstring round gown. Perfectly good for use with an open robe. Nobody needs to know about the Lady Washington's little act of mischief. |

 |
| A lovely drape on the train. |

 |
| A detail of the back, far from perfect, but still pretty. |

 |
| Looks like my dress form is standing in a hole. LOL. I have her set a bit lower than my actual height. |
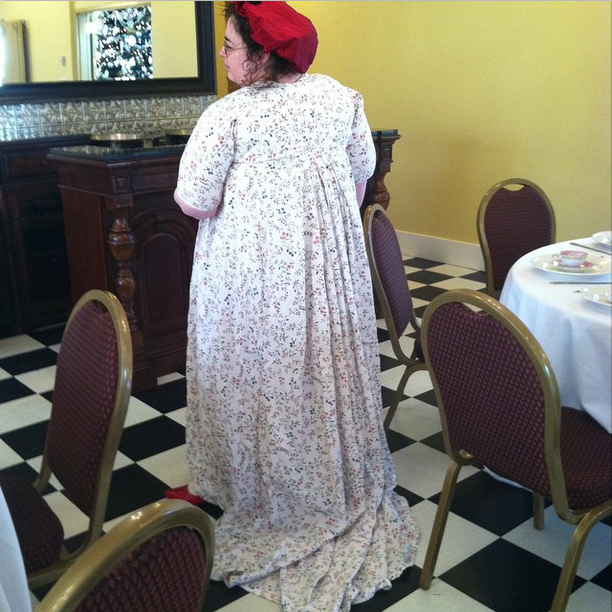
UPDATE: A couple of pics of the gown being worn by chubby moi. This was in December at the Jane Austen Birthday Tea at Ainsworth House & Gardens in Oregon City.